
Adding a cookie banner to your website
Learn how to add a cookie banner to your website and ask visitors for their consent to use cookies. A cookie banner appears when a visitor comes to the site.
First, remove the tags that store cookies from the Head, Body Start, and Body End sections of the site through Page Manager. Also, remove the Google Analytics ID from the Analytics section of the User Panel.
If there are no code tags installed on your website, it doesn't require a cookie banner.
Creating a cookie banner
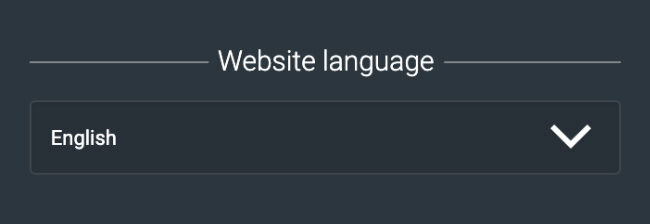
Check the website language settings in the page manager. Texts are in English by default.

To enable the cookie banner, move the slider in the page manager to the on position.
Click Cookie Banner Settings to edit the settings.
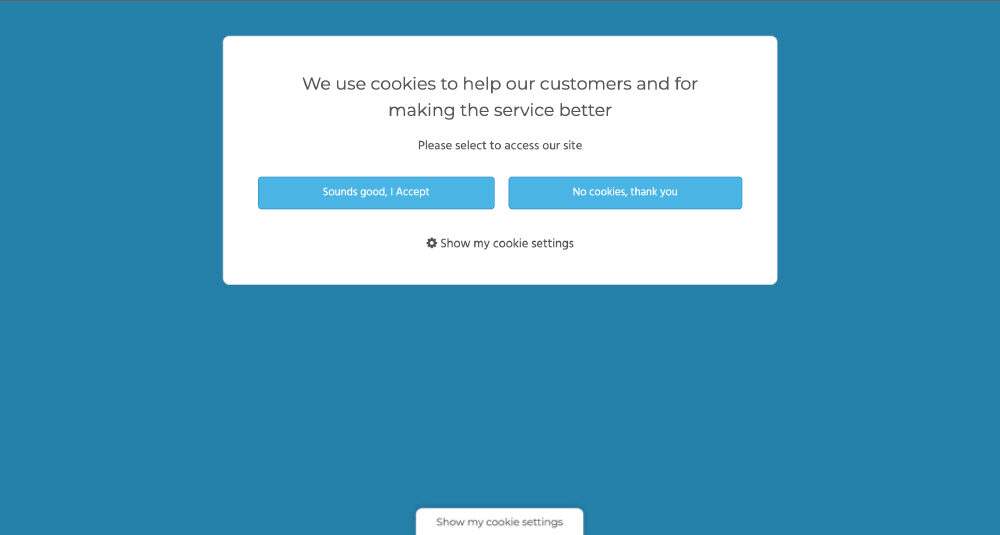
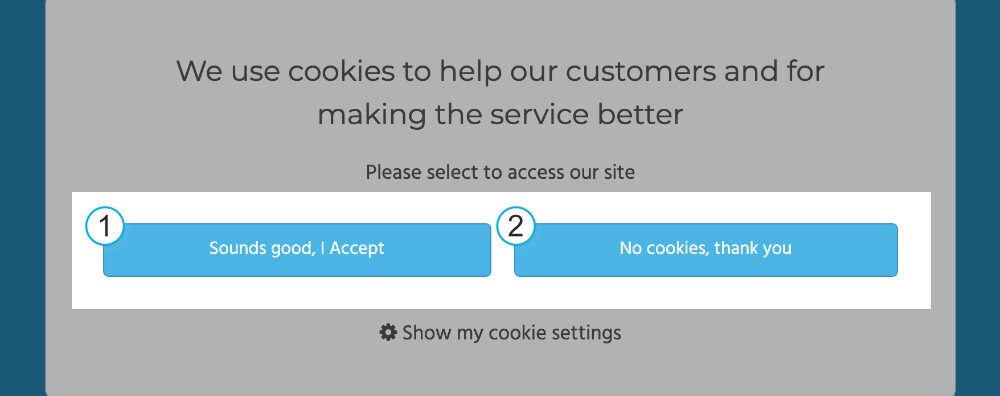
A cookie banner consists of two views. First, the visitor will see a banner appearing stating that the site is using cookies. When a visitor clicks the edit cookie settings link, they can see more information and choose which cookies to use.
Cookie banner settings
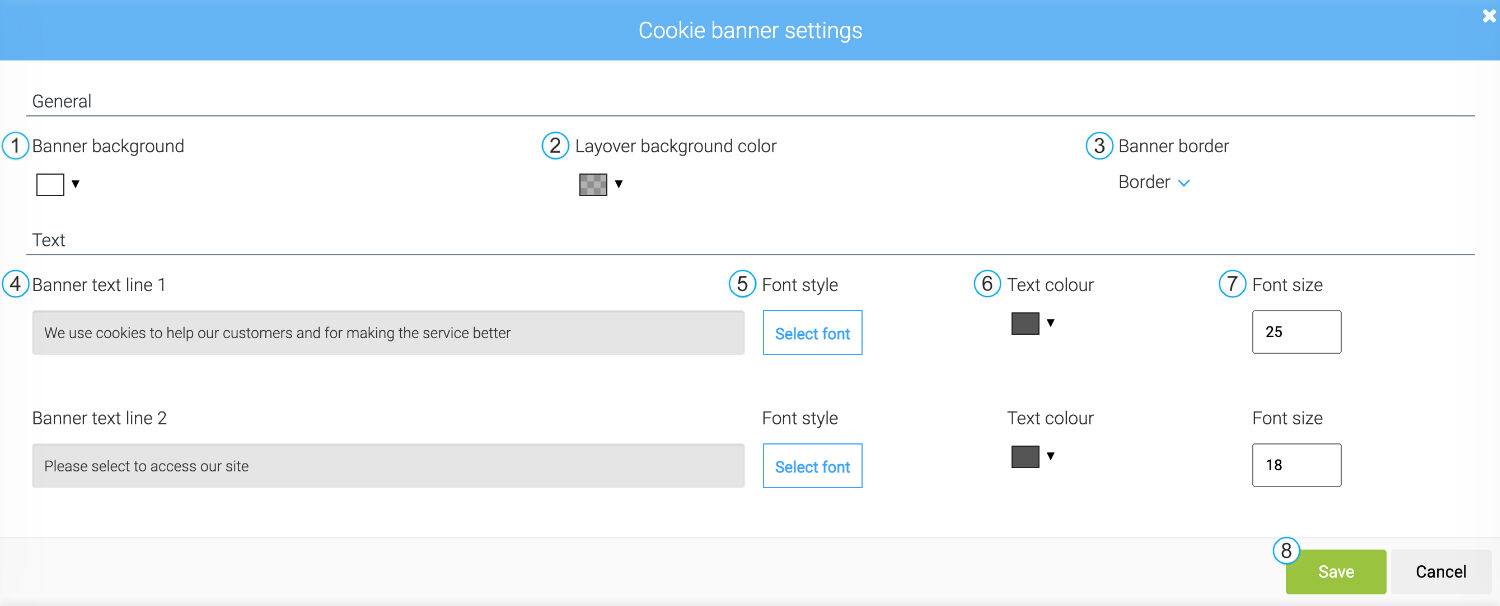
General settings
- Cookie banner background color
- The layover color comes on top of the site when the banner appears in the window
- Banner border settings
- The first and second lines of text in the banner briefly explain what cookies are used for and prompt the visitor to choose how the site is allowed to use cookies. You can edit these texts as you like.
- Font options
- Text color
- Font size
- Always remember to save your changes
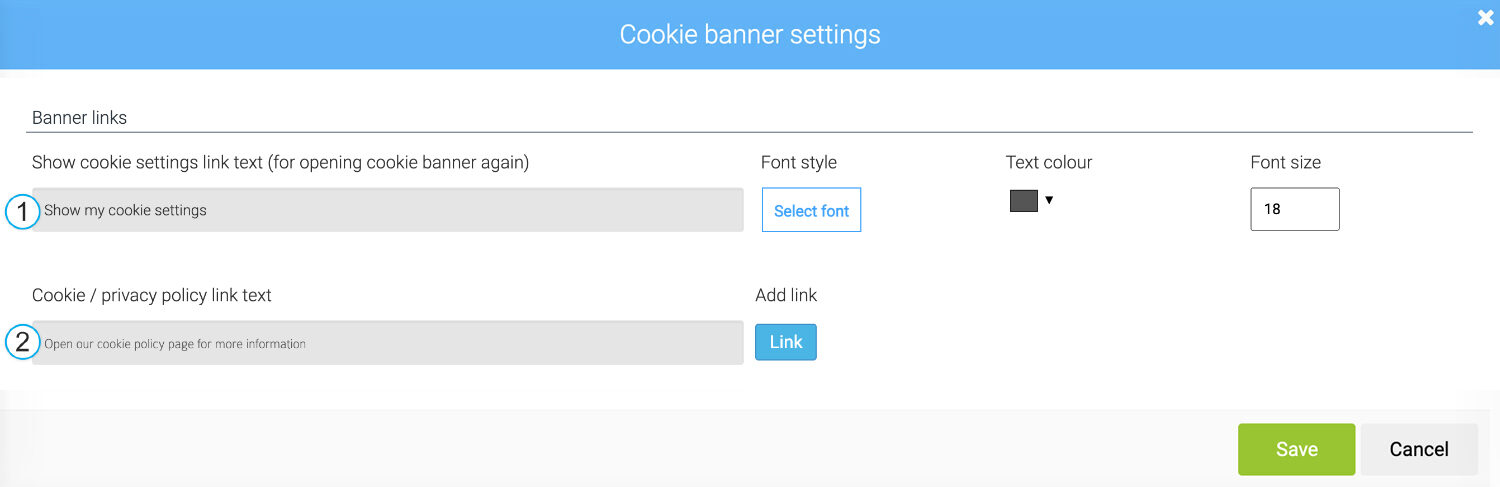
Banner links
- The show cookie settings link reopens the cookie settings for the visitor. This link appears when the visitor moves the mouse cursor to the bottom of the window.
- The cookie / privacy policy link allows you to link to a privacy policy page. The link will appear in the banner below your cookie settings.
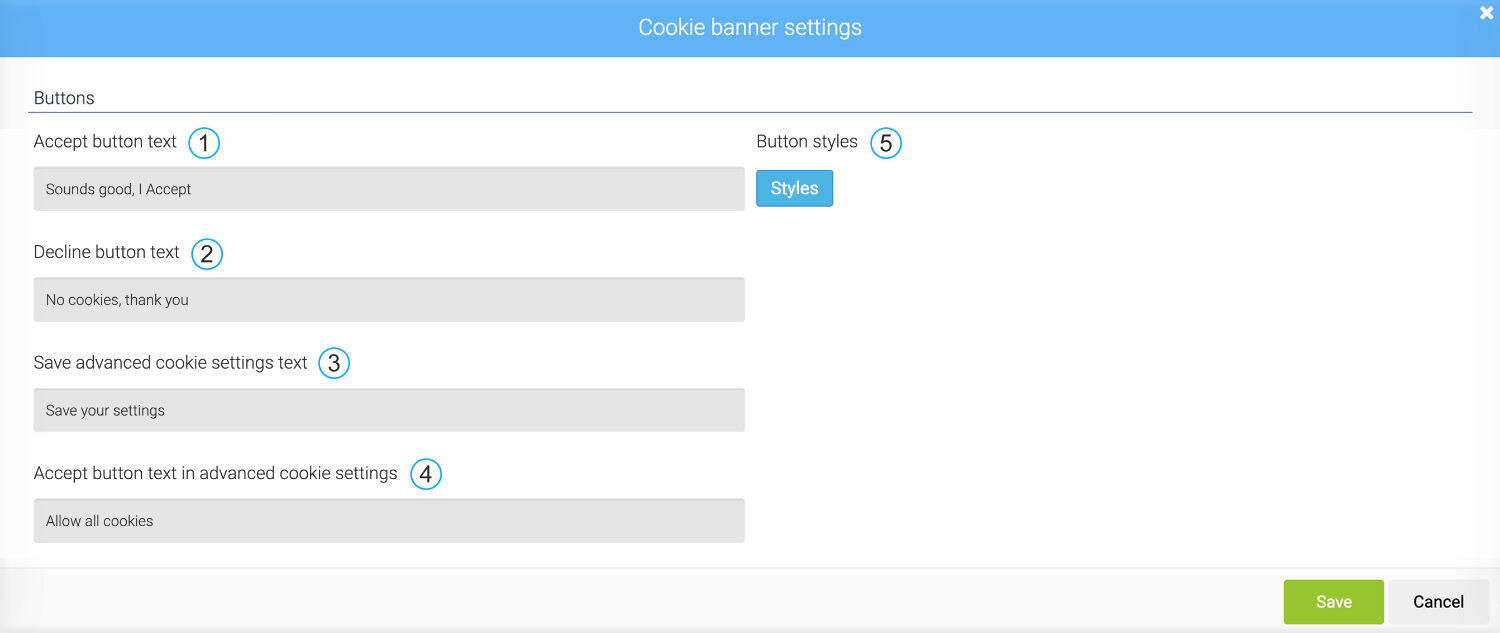
Buttons
You can edit the button texts as you like. Each button has its own function.
- Accept all cookies
- Accept strictly necessary cookies only
- Save your settings (cookie settings view)
- Allow all cookies (cookie settings view)
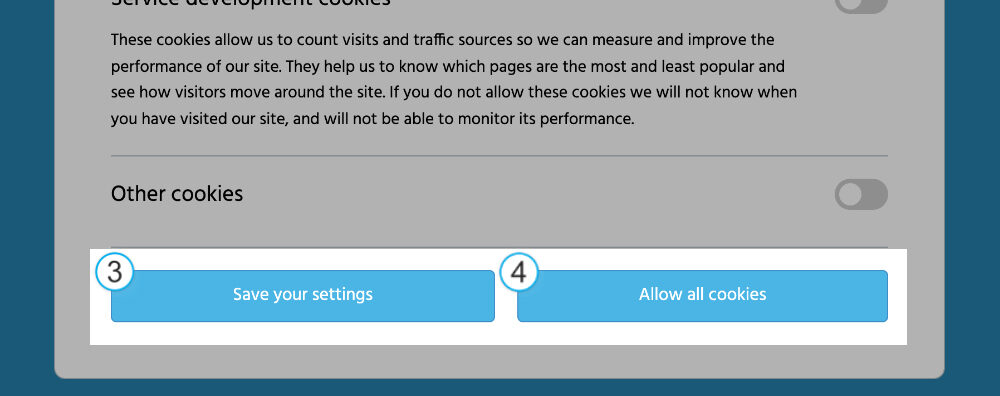
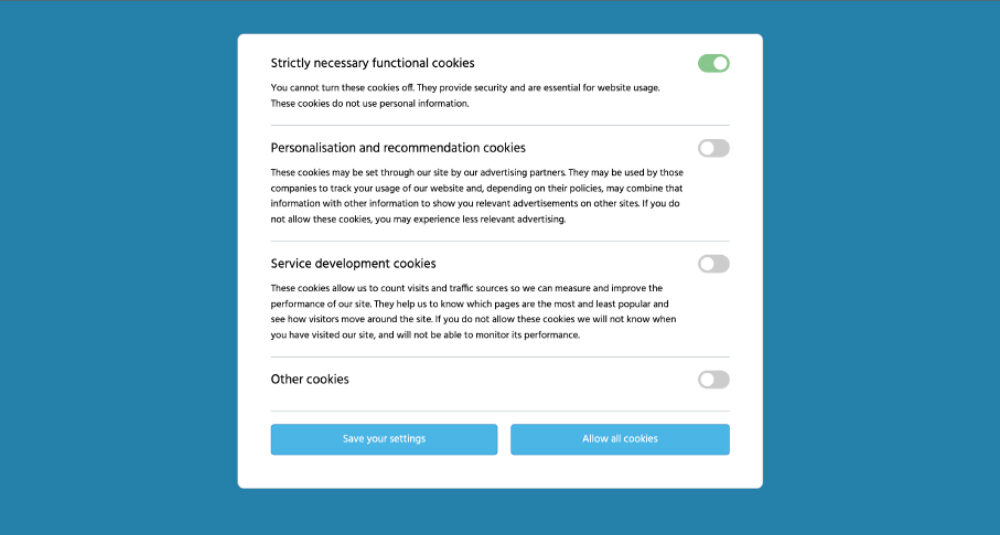
Cookie settings

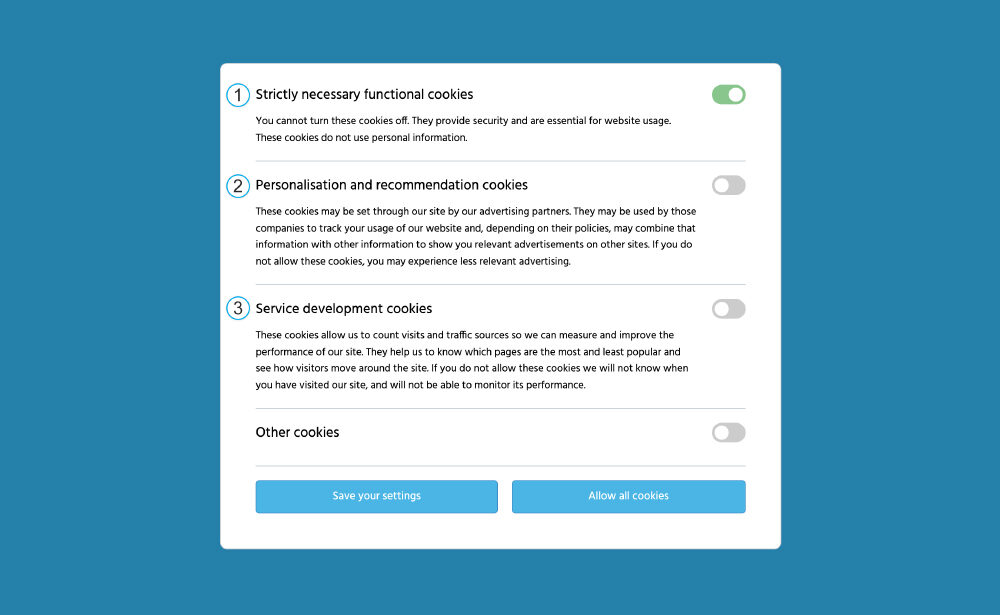
In the cookie settings view, the visitor can learn more about the cookies used on the website. You can edit these texts as you wish.
By editing the javascript code (edit javascript code to be used after user consent) you can add analytics to the site, for example. This code will only be used after the user's consent.
- Strictly necessary functional cookies are important for the security and operation of the website and cannot be blocked.
- Personalization and recommendation cookies track the use of the website, which can be combined with other information. Related to targeted advertising.
- Cookies for service development include analytics tools that can be used to measure and improve the performance of the website. Does not contain personally identifiable information.
- Other cookies may be necessary, for example, due to the chat plug-in.
NOTE:
- Install all the codes inside their own separate <script> tags to make the banner work properly.
- Google Analytics and Tag Manager codes automatically take advantage of Google's consent mode feature, which means that they do not need to be added to a tag individually for the tag to work properly.